
On this page
Introduction
Choosing the right bathroom tiles can transform your space from functional to spectacular, but navigating the options available in the UK market feels overwhelming. This comprehensive bathroom tiles UK guide walks you through every decision you'll face—from understanding material differences to installation tips that prevent costly mistakes. We've compiled advice from industry professionals and our experience working with verified tiles suppliers across the UK to help you make informed choices.
Key Takeaways
- Porcelain tiles offer superior water resistance and durability compared to ceramic, making them ideal for wet areas despite costing 20-40% more
- Professional tiling costs typically range from £25-£60 per m² in the UK, with London prices reaching £80+ per m² for complex installations
- Large format tiles (600x600mm+) create a modern, seamless look but require perfectly flat surfaces and experienced installers
- Anti-slip ratings (R9-R13) are crucial for bathroom safety—look for R10 minimum for shower areas
- You can tile over existing tiles if they're firmly attached, saving removal costs of £10-£20 per m²
What is the Difference Between Porcelain and Ceramic Tiles?
This question dominates every bathroom renovation discussion, and for good reason. The porcelain vs ceramic tile durability comparison reveals significant differences that affect both performance and budget.
Ceramic tiles are made from red or white clay fired at lower temperatures (around 1,000°C). They're less dense, more porous, and typically have a glazed surface that provides colour and water resistance. Porcelain tiles undergo firing at temperatures exceeding 1,200°C, creating a much denser, harder product that's water-resistant throughout—not just on the surface.
Here's how they stack up:
| Feature | Ceramic Tiles | Porcelain Tiles |
|---|---|---|
| Water Absorption | 3-10% (more porous) | <0.5% (virtually waterproof) |
| Durability | Moderate; chips show white clay beneath | High; colour runs through tile |
| Cost per m² | £15-£35 | £25-£65+ |
| Suitable For | Low-traffic bathrooms, walls | Floors, wet rooms, high-traffic areas |
| Cutting Difficulty | Easy (standard tile cutter) | Harder (wet saw often needed) |
| Weight | Lighter | Heavier (consider floor load) |
We recommend porcelain for bathroom floors and shower enclosures where water exposure is constant. Ceramic works perfectly well for walls in standard bathrooms, saving you money without compromising quality. According to the Tile Association, porcelain has become the dominant choice for UK bathroom renovations, accounting for approximately 65% of installations.
How Much Does Tiling Cost Per m2 UK?
Budgeting accurately prevents nasty surprises halfway through your project. Based on recent data from Checkatrade and our conversations with bathroom specialists listed on HouseJester, here's what you'll pay:
Labour costs (supply and fit):
- Standard ceramic wall tiles: £25-£40 per m²
- Porcelain floor tiles: £40-£60 per m²
- Large format tiles (600x600mm+): £50-£80 per m²
- Metro/brick pattern tiles: £35-£55 per m²
- Complex patterns (herringbone, chevron): £60-£100 per m²
Regional variations: London installers typically charge 30-50% more than the national average. A bathroom floor costing £45 per m² in Manchester might reach £65-£70 per m² in the capital. Southeast England generally sits 15-20% above Midlands and Northern pricing.
Additional costs to factor in:
- Tile adhesive and grout: £5-£10 per m²
- Waterproof tanking membrane: £15-£25 per m²
- Removing existing tiles: £10-£20 per m²
- Floor levelling compound: £8-£15 per m²
- Underfloor heating (if installing): £75-£100 per m²
For a typical 6m² bathroom with mid-range porcelain tiles, expect total costs between £1,200-£2,400 including materials and labour. Luxury installations with large format tiles and complex layouts easily reach £3,500-£5,000.
Best Tiles for Underfloor Heating
Underfloor heating (UFH) transforms winter bathroom experiences, but tile selection matters enormously for efficiency and performance.
Porcelain and ceramic both conduct heat effectively, making them ideal UFH companions—far superior to vinyl or wood. The key consideration isn't material type but tile thickness and thermal mass. Thinner tiles (8-10mm) heat up faster, responding quickly to thermostat adjustments. Thicker tiles (12mm+) take longer but retain heat better once warm.
We've found these specifications work best with UFH:
- Tile thickness: 8-10mm for electric systems, up to 12mm for water-based systems
- Adhesive: Flexible, rapid-set adhesive rated for UFH (look for BS EN 12004 classification)
- Grout: Flexible grout that accommodates thermal expansion
- Format: Larger tiles mean fewer grout lines, improving heat transfer efficiency
Stone tiles like limestone, travertine, and slate are magnificent heat conductors but require sealing. Natural stone typically costs £45-£120 per m² for materials alone.
The Energy Saving Trust notes that UFH works most efficiently with hard floor coverings, and tiles paired with proper insulation beneath can reduce heating costs by 15-20% compared to radiator-only systems.
Large Format Tile Installation Tips and Tricks
Large format tiles (typically 600x600mm and above, with some reaching 1200x600mm) create stunning, contemporary bathrooms with minimal grout lines. They're increasingly popular, but installation demands precision.
Surface preparation is critical. Large tiles show every imperfection in the substrate. Your floor must be flat to within 3mm over a 2-metre span—anything less and you'll have lippage (tiles at different heights) or hollow spots that crack under pressure. We recommend professional floor levelling for any large format installation.
Here are the essential large format tile installation tips tricks:
- Use the right adhesive: Standard adhesive doesn't provide enough coverage. Use medium-bed or large-format adhesive with notched trowels sized 10-12mm
- Back-buttering is non-negotiable: Apply adhesive to both floor and tile back to ensure 95%+ coverage
- Install levelling systems: Raimondi or similar tile levelling clips prevent lippage during curing
- Plan your layout carefully: Even small cuts at edges look terrible with large tiles. Centre your layout to maximise full tiles
- Check for voids: Tap each tile after setting. Hollow sounds indicate insufficient adhesive—lift and re-set immediately
- Allow proper curing time: Large tiles put more stress on adhesive. Wait 48-72 hours before grouting and longer before heavy use
One installer in Birmingham we work with refuses large format installations for DIYers, insisting these require professional expertise. After seeing several botched attempts, we agree. Budget £50-£80 per m² for professional large format installation.
Can You Tile Over Existing Tiles?
Yes, absolutely—but conditions matter. Tiling over existing tiles saves the messy, time-consuming work of tile removal and saves you £10-£20 per m² in labour costs. However, you'll add 10-15mm height to your floor, which affects door clearances and creates trip hazards at thresholds.
When tiling over tiles works:
- Existing tiles are firmly attached with no movement or hollow sounds
- The surface is clean, dry, and degreased
- You're willing to address the height increase
- Wall tiles are taking another layer (weight considerations apply)
When you must remove old tiles:
- Any looseness, cracking, or water damage beneath
- Floor height increase would create problems
- The existing surface is extremely smooth (gloss tiles)—adhesive won't bond properly
Process for tiling over existing tiles:
- Test every tile for hollowness—tap with a screwdriver handle
- Remove any loose tiles; fill voids with levelling compound
- Clean thoroughly with sugar soap; rinse and dry completely
- Apply a primer/bonding agent designed for glazed surfaces
- Use flexible, polymer-modified adhesive
- Proceed with normal tiling technique
Building Regulations don't prohibit tiling over tiles, but if your renovation requires Building Control approval (structural changes, electrical work zones), inspectors will want to verify the substrate's soundness.
Anti-Slip Tiles and Bathroom Safety
Wet bathroom floors are hazardous. The British Standards Institution uses the 'R' rating system for anti-slip tiles bathroom ratings, testing slip resistance with oil:
- R9: Minimal slip resistance (dry areas only)
- R10: Moderate slip resistance (suitable for most bathrooms)
- R11: Enhanced slip resistance (recommended for shower areas)
- R12-R13: Maximum slip resistance (commercial/public facilities)
For homes, we recommend R10 minimum for general bathroom floors and R11 for walk-in showers. Textured porcelain tiles, honed stone, and small mosaic tiles (more grout lines = more grip) all provide good slip resistance.
Matt finishes are safer than polished tiles, but avoid extremely rough surfaces that are difficult to clean. Some textured tiles trap dirt and require intensive scrubbing.
Read our complete guide to bathroom tiling ideas and guide for design inspiration that balances aesthetics with safety.
Kitchen Splashback Tile Ideas UK
Whilst our focus is bathrooms, kitchen splashback tile ideas UK trends influence bathroom design considerably. The current favourites include:
- Metro tiles: The 200x100mm white brick pattern remains timelessly popular, costing £20-£45 per m²
- Encaustic cement tiles: Moroccan-inspired patterns add personality; expect £60-£150 per m²
- Glass tiles: Reflective surfaces brighten spaces; prices range £40-£90 per m²
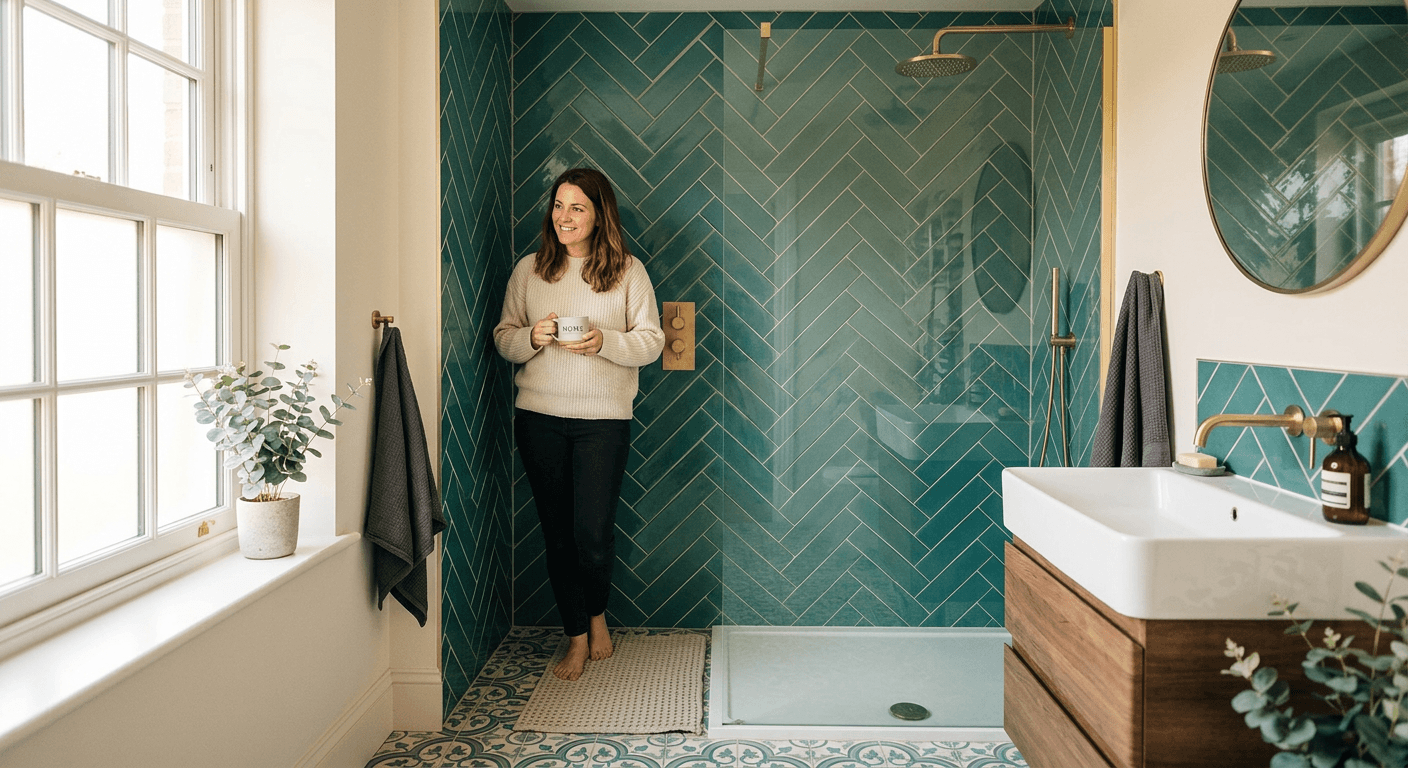
- Herringbone layouts: Classic wood-effect or plain tiles arranged in chevron patterns
- Large format porcelain slabs: 3000x1000mm pieces with virtually invisible joins, from £200+ per m²
Many of these translate beautifully to bathroom feature walls. Mixing plain field tiles with a patterned feature section keeps costs manageable whilst adding visual interest.
The Homebuilding & Renovating magazine's 2023 reader survey found that 43% of renovators chose subway/metro tiles for bathrooms, with large format porcelain close behind at 31%.
Common Tiling Mistakes to Avoid
We've seen these errors repeatedly across projects:
Poor waterproofing: Tiles aren't waterproof—water travels through grout. Always use tanking membrane on shower walls and wet room floors. This costs £80-£150 for materials but prevents thousands in water damage repairs.
Inadequate movement joints: Tile installations need expansion gaps around perimeters and at changes of plane (wall to floor). Fill these with flexible silicone, not grout. Rigid installations crack.
Wrong adhesive selection: Not all adhesives suit all applications. Use flexible adhesive for wooden substrates, rapid-set for UFH, and waterproof adhesive for wet areas. Check BS EN 12004 classifications.
Ignoring layout planning: Starting installation without dry-laying first leads to awkward cuts. Spend 30 minutes planning to avoid sliver cuts at edges.
Insufficient drying time: Rushing grouting causes adhesive failure. Rushing sealing causes grout staining. Follow manufacturer cure times religiously.
Skimping on prep work: Every hour spent preparing substrates saves problems later. Clean, level, and prime properly.
Finding the Right Tile Installer
Quality installation matters as much as tile selection. Search our tiles directory for verified local suppliers, many of whom also install or recommend trusted fitters.
Look for installers with:
- Tile Association membership or NVQ Level 2 Wall & Floor Tiling qualification
- Public liability insurance (minimum £2 million)
- Recent photographs of completed work
- Detailed written quotes breaking down labour and materials
- Clear payment terms (never pay everything upfront—30% deposit, 40% midway, 30% on completion is fair)
Get three quotes for comparison. The cheapest often isn't the best value. An experienced installer charging £50 per m² who works efficiently and avoids mistakes saves money compared to a £35 per m² tradesperson who takes twice as long and makes errors.
If you're a tiling professional looking to reach homeowners searching for quality installers, list your business on HouseJester to connect with customers across the UK.
Conclusion: Making Your Tile Choices
Bathroom tile selection balances aesthetics, performance, and budget. Porcelain offers superior durability for wet areas despite higher costs. Large format tiles create contemporary looks but demand professional installation. Anti-slip ratings ensure safety. Proper preparation and quality installation prevent expensive failures.
Start by determining your budget per square metre, including both materials and labour. Choose tiles appropriate for each area—slip-resistant R10+ for floors, any suitable tile for walls. Plan your layout to minimise awkward cuts. If your project includes underfloor heating, confirm tile and adhesive compatibility.
Most importantly, don't rush. Bathroom tiles last 15-25 years typically. Investing time in selection and proper installation pays dividends in daily enjoyment and home value.
Browse tiles businesses on HouseJester to find verified suppliers and installers near you, or browse all categories for complete bathroom renovation services.
Sources & Further Reading
- The Tile Association - UK trade body for tile retailers, fixers, and distributors with technical guidance and qualified installer directory
- Checkatrade: Cost of Tiling Guide - Regularly updated pricing data from UK tradespeople
- Which? Bathroom Installation Guide - Independent consumer advice on bathroom renovations including tiling
This article was created with AI assistance and reviewed by the HouseJester editorial team for accuracy and relevance.
Written by
Emma Richardson
Kitchen & Bathroom Specialist
Emma has reviewed hundreds of kitchen and bathroom installations across the UK. She combines product knowledge with real-world testing to help homeowners choose the right fitters and materials for their projects.
- Fitted Kitchens
- Bathrooms
- Tiles
- Heating & Plumbing